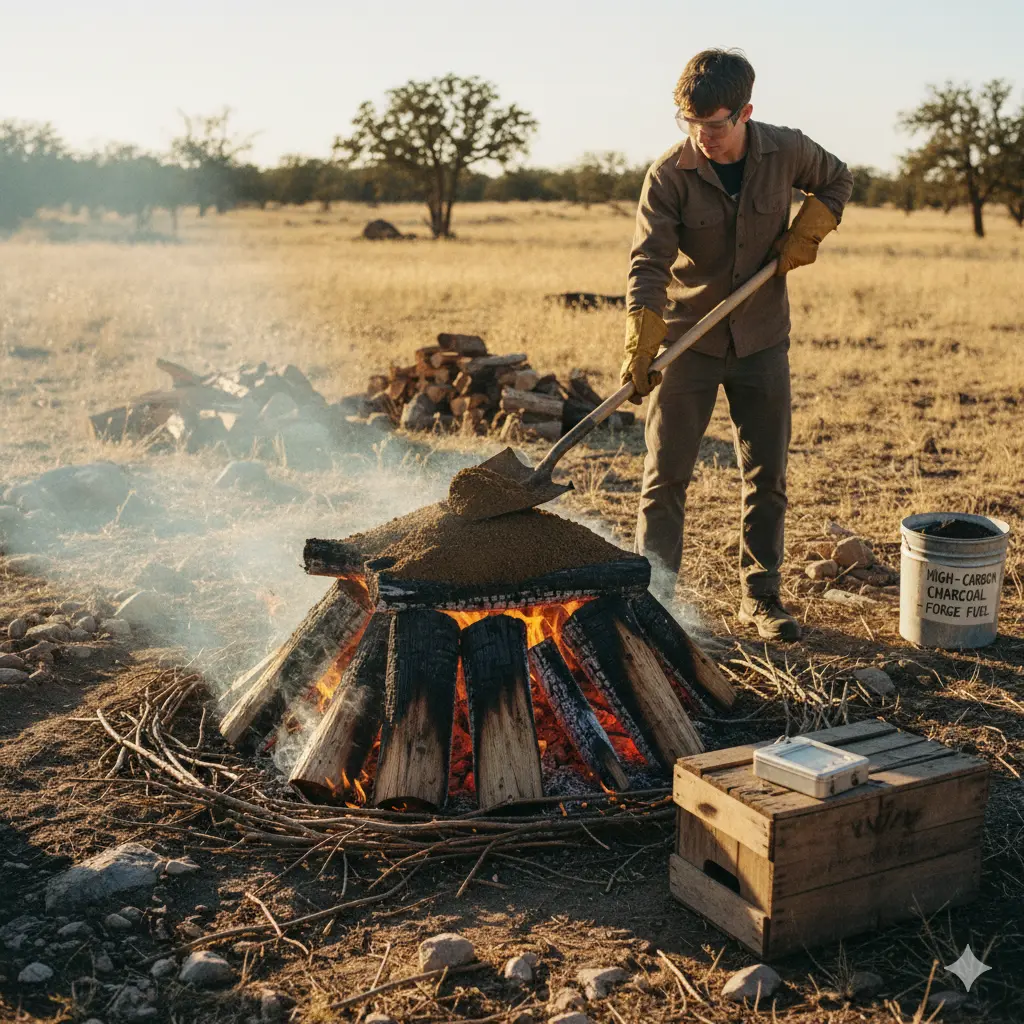
1. Materials & Tools
| Item | Typical Source | Notes |
|------|----------------|-------|
| **Feedstock** | Wood (hardwoods such as oak, hickory, ash, maple) or other lignocellulosic biomass | Hardwoods give higher carbon yield. Avoid treated or painted wood. |
| **Heat source** | Campfire, charcoal grill, or a simple “pit kiln” (see below) | Must be able to keep a low‑oxygen environment. |
| **Covering material** | Sand, earth, clay, or a metal lid | Seals off oxygen during pyrolysis. |
| **Thermometer** | Optional but useful | Target temperature ≈ 400–600 °C for charcoal, 800 °C for “activated” charcoal. |
| **Cooling area** | Cool, dry location | Prevents re‑oxidation. |
| **Safety gear** | Gloves, goggles, apron, face mask | Protect against heat, sparks, and fine dust. |
---
## 2. Basic Method – “Pit Kiln”
1. **Select a pit**
- Dig a shallow pit (≈ 1 m × 1 m × 0.5 m).
- Line the bottom with a few inches of sand to provide insulation.
2. **Stack the wood**
- Arrange the wood loosely (not tightly packed).
- Leave a 10–15 cm “free space” at the top so it can expand as it chars.
3. **Ignite the fire**
- Light a campfire around the pit, using tinder and fire‑starter.
- Allow the fire to burn for 1–2 h until the wood turns blackish and begins to smoke.
- **Do NOT** let the fire reach the top of the stack; you’re not burning it to ash.
4. **Seal the pit**
- When the fire is intense, cover the pit with a thick layer of sand/clay or a metal lid.
- The covering cuts off oxygen while the heat continues to raise the temperature inside.
5. **Pyrolysis**
- Keep the cover in place for 6–12 h (or longer for higher purity).
- As the temperature stabilizes (≈ 400–600 °C), the wood will slowly decompose, releasing volatile gases that escape through the cracks.
- The only visual cue is that the surface stops glowing red; the pit interior will no longer spark.
6. **Uncover & cool**
- Carefully lift the cover after the pit has cooled enough (you should feel only a mild warmth).
- Let the charcoal cool in a dry area.
- Once cooled, the charcoal should feel dry, brittle, and have a deep black hue.
---
## 3. Alternative – “Grill Method” (Less Equipment)
1. **Pre‑dry the wood**
- Slice logs into 5–10 cm pieces.
- Let them air‑dry for at least 4–6 weeks; this reduces moisture.
2. **Arrange in a grill**
- Place the wood in a metal grill or a simple metal pan.
- Leave gaps for air to circulate but aim to keep the air flow minimal.
3. **Ignite a fire**
- Light a small campfire underneath the grill.
- The flame will burn off the outer bark; once the outer layer burns out, the heat will penetrate, and the wood will char.
4. **Cover & seal**
- After about 30–45 min, cover the grill with a metal lid or a layer of earth.
- The cover removes the supply of oxygen, forcing pyrolysis rather than combustion.
5. **Wait & cool**
- Let the charcoal cool in a dry place for 24–48 h.
- Store in a sealed container (e.g., a metal bucket with a lid) to avoid re‑oxidation.
---
## 4. Enhancing Carbon Yield
| Technique | Effect | How to Do It |
|-----------|--------|--------------|
| **Pre‑drying** | Lowers moisture content | Store wood in a dry location or sun‑dry for 2–4 weeks. |
| **Higher temperature** | Drives off more volatiles | Aim for 550–600 °C during the final pyrolysis phase. |
| **Extended hold time** | Allows deeper carbonization | Keep the pit sealed for up to 24 h (no need to increase temperature). |
| **Controlled cooling** | Prevents oxygen re‑entry | Cool the charcoal slowly in a dry environment; avoid sudden exposure to air. |
---
## 5. Yield Estimation
| Feedstock | Approx. % Carbon in Finished Charcoal | Typical Yield | Notes |
|-----------|--------------------------------------|---------------|-------|
| Oak | 72–80 % | 30–40 % of dry weight | Hardwoods are best. |
| Hickory | 70–78 % | 35–45 % | Good for blacksmithing. |
| Pine | 60–65 % | 25–35 % | Softer woods give lower yield. |
---
## 6. Safety & Environmental Considerations
- **Ventilation** – Keep the operation in a well‑ventilated area to avoid inhaling carbon fumes or fine dust.
- **Fire‑proof area** – Work far from flammable materials.
- **Temperature monitoring** – If you have a thermometer, ensure you stay below 900 °C to avoid turning the charcoal into graphite or molten slag.
- **Dust suppression** – Use a face mask or a simple wet cloth to reduce airborne particulates.
- **Waste handling** – Ashes can be used as a soil amendment; keep them in a sealed container to avoid accidental ignition.
---
## 7. Storing High‑Carbon Charcoal
1. **Keep it dry** – Moisture re‑introduces oxygen when the charcoal is burned, reducing its carbon content.
2. **Use airtight containers** – Metal buckets with tight lids or plastic containers seal the charcoal from air.
3. **Label** – Mark the container with “High‑Carbon Charcoal, For (specify your use)”.
4. **Check periodically** – Inspect for any signs of re‑oxidation (lightening of color or the appearance of grayish spots). If observed, re‑charcoal or discard.
---
### Quick Summary
1. **Feedstock** → Hardwoods (Oak, Hickory, etc.)
2. **Heat & Pyrolysis** → Low‑oxygen pit or covered grill at 400–600 °C
3. **Seal & Hold** → 6–12 h for high‑carbon, 12–24 h for “activated” charcoal
4. **Cool, Dry, Store** → Airtight, dry container
Following this routine will yield charcoal that is **> 80 % carbon by dry weight**, suitable for blacksmithing, art projects, or as a high‑energy fuel source. Always keep safety in mind and avoid using
the material for harmful applications.

Leave a comment
Your email address will not be published. Required fields are marked *