Ever wondered how those gourmet cafes get those perfectly soft, cloud-like marshmallows that melt in your mouth? Spoiler: they probably made them themselves. And guess what? You can too! Making marshmallows from scratch is way easier than you think, super satisfying, and the end result is chefs kiss. Plus, they're infinitely better for s'mores, hot cocoa, or just eating straight off the counter. Let's get sticky!
What You'll Need (The Gear Up!)
No fancy astronaut equipment, just some kitchen essentials:
- Stand Mixer (with whisk attachment): This is your MVP. Trust me, trying to do this by hand is a workout you didn't sign up for.
- Large Pot: For boiling that sugar syrup.
- Candy Thermometer: Crucial for hitting the right temperature. Don't skip this, unless you're a sugar wizard (which, if you are, hit me up!).
- 9x13 inch Baking Pan: Or a similar-sized dish.
- Parchment Paper: Essential for non-stick action.
- Sieve/Fine-Mesh Strainer: For dusting.
- Rubber Spatula: For scraping all that goodness.
- Sharp Knife or Pizza Cutter: For cutting your fluffy clouds.
The Goods (Ingredients – Keep it Real!)
This recipe yields a decent batch, enough for major marshmallow flexing.
- 1 cup (240ml) Cold Water: Divided into 1/2 cup portions.
- 3 packets (2.25 oz or about 65g total) Unflavored Gelatin Powder: Not the Jell-O kind! This is what gives your marshmallows that bouncy texture.
- 2 cups (400g) Granulated Sugar: Yes, it's a lot. We're making marshmallows, not a health smoothie.
- 2/3 cup (160ml) Light Corn Syrup: Don't substitute! This prevents crystallization and keeps them smooth.
- 1/4 tsp Salt: Balances the sweetness.
- 1 tbsp Vanilla Extract: For that warm, classic marshmallow flavor. Don't cheap out here!
- 1/2 cup (60g) Powdered Sugar (Icing Sugar): For dusting.
- 1/2 cup (60g) Cornstarch: For dusting.
Let's Get Cooking: The Marshmallow Magic!
This is broken into three main phases: blooming, boiling, and whipping. Stay focused, you got this!
Phase 1: Bloom the Gelatin (The Foundation)
- Prep Your Pan: Lightly spray your 9x13 inch baking pan with non-stick spray. Line it with parchment paper, leaving an overhang on the sides – this will be your "handles" later. Lightly spray the parchment paper too.
- Make the Dusting Mix: In a small bowl, whisk together the powdered sugar and cornstarch. Generously sprinkle about half of this mix over your prepared pan, making sure to get the sides. This is key for non-stick. Set aside the rest of the mix.
- Hydrate that Gelatin: In the bowl of your stand mixer, pour 1/2 cup of cold water. Evenly sprinkle the 3 packets of gelatin powder over the water. Stir briefly to combine. Let it "bloom" (thicken and get jiggly) for about 5-10 minutes while you do the next step.
Phase 2: Boil the Syrup (The Hot Stuff)
- Sugar & Syrup Party: In your large, heavy-bottomed pot, combine the remaining 1/2 cup cold water, granulated sugar, light corn syrup, and salt.
- Heat it Up: Place the pot over medium-high heat. Stir constantly until the sugar dissolves. Once it starts boiling, stop stirring.
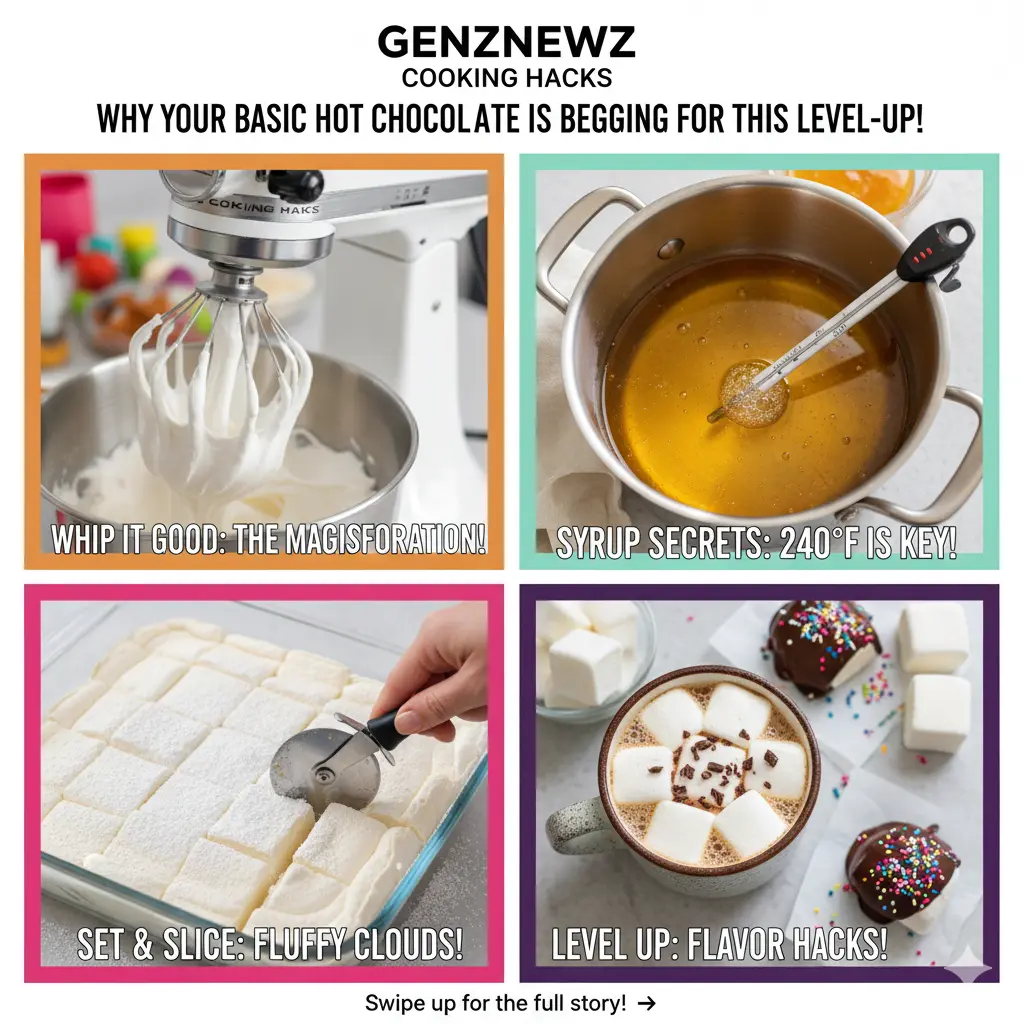
- Temperature Check: Clip your candy thermometer to the side of the pot, making sure the tip isn't touching the bottom. Let the syrup boil, undisturbed, until it reaches precisely 240°F (115°C). This is the "soft ball" stage. Don't walk away! This usually takes about 8-12 minutes.
Phase 3: Whip it Good (The Transformation!)
- Pour & Whip: As soon as your syrup hits 240°F, immediately remove it from the heat. Turn your stand mixer on low speed (with the whisk attachment going). Carefully, slowly, and steadily pour the hot sugar syrup in a thin stream down the side of the mixer bowl, directly into the bloomed gelatin. Avoid pouring it directly onto the whisk, as it might splatter.
- Increase Speed: Once all the syrup is added, increase the mixer speed to high.
- Whip, Whip, Whip! Let that mixer go! This is where the magic happens. The mixture will start to thicken, get opaque, and grow significantly in volume. It'll go from liquid to glossy, thick, and marshmallow-y. This usually takes about 10-15 minutes.
- Flavor Drop: About a minute or two before it's done (when it's already looking like thick marshmallow fluff), add the vanilla extract.
- Done When: You know it’s ready when the mixture is very thick, incredibly white, glossy, and holds stiff peaks. If you stop the mixer and lift the whisk, the marshmallow should form a peak that slowly (very slowly) slumps over. The bowl will also feel significantly cooler to the touch.
Phase 4: Set & Slice (The Grand Finale)
- Transfer: Quickly and carefully scrape the marshmallow mixture into your prepared, dusted baking pan. It will be super sticky, so use your greased rubber spatula!
- Smooth It Out: Gently spread the marshmallow evenly into the pan. You might need to lightly grease your hands or the spatula to help.
- Dust Again: Sprinkle the remaining powdered sugar/cornstarch mixture generously over the top of the marshmallow.
- Let it Chill: Leave the marshmallow to set at room temperature for at least 4 hours, or preferably overnight. Do NOT put it in the fridge; it will get weird and sticky.
- Cut 'Em Up: Once fully set, invert the marshmallow slab onto a cutting board heavily dusted with your powdered sugar/cornstarch mix. Peel off the parchment paper. Lightly dust your sharp knife or pizza cutter with the mix, and cut the slab into your desired size squares.
- Coat & Store: Toss the cut marshmallows in more of the dusting mix to prevent sticking. Store them in an airtight container at room temperature for up to 2-3 weeks.
Level-Up Your Marshmallows (Flavor Hacks!)
Once you master the basic recipe, the world is your oyster!
- Citrus Zest: Add orange, lemon, or lime zest when you add the vanilla for a bright kick.
- Coffee/Espresso: Dissolve a teaspoon of instant espresso powder in the hot water with the sugar for mocha marshmallows.
- Peppermint: Swap vanilla extract for peppermint extract (use less, it's strong!) for a festive treat.
- Food Coloring: Add a few drops of gel food coloring during the whipping phase for fun, colorful marshmallows.
- Dipped in Chocolate: Once cooled, dip your marshmallows in melted chocolate and let set on parchment paper. Game changer!
There you have it! Homemade marshmallows that are about to change your hot chocolate game forever. Get ready to impress, share (or not, no judgment!), and enjoy the fluffy, sweet goodness you created with your own two hands. You're basically a dessert wizard now!
Comments 0
No comments yet. Be the first to share your thoughts!
Leave a comment
Share your thoughts. Your email will not be published.